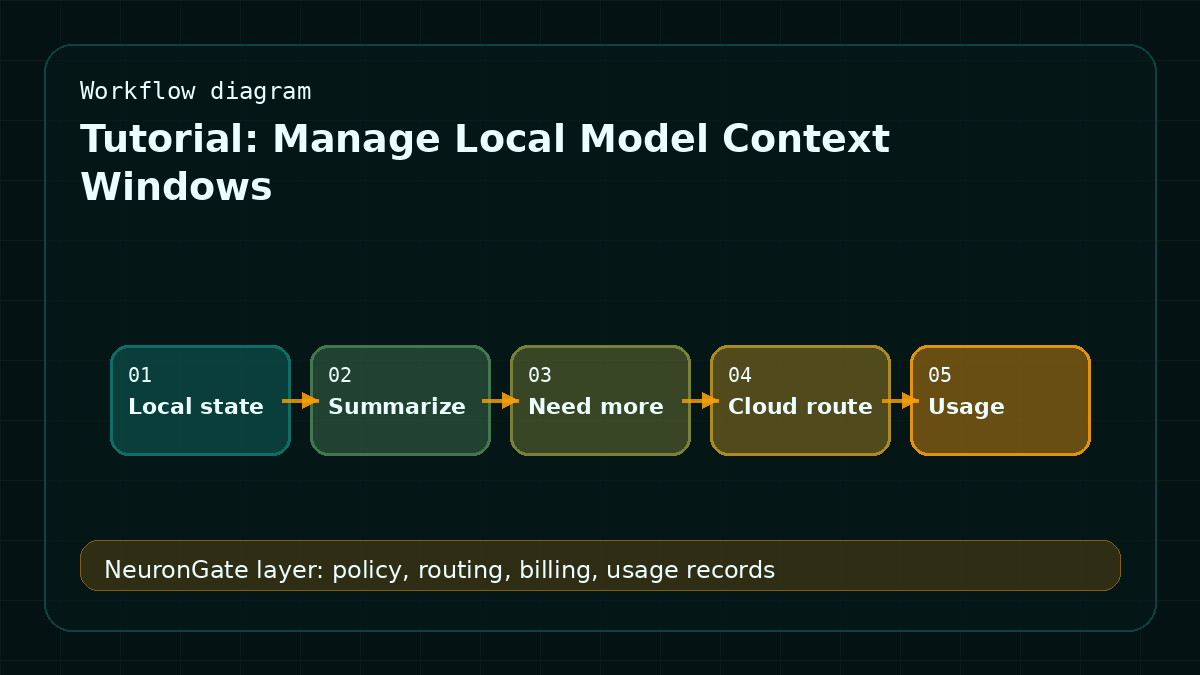
Local models need context discipline because device memory and user privacy both matter. In October 2025, this mattered because the context window became a product constraint, not only a model spec. The practical response was simple: keep only task-relevant state local, summarize long history, and escalate to cloud only when the task needs more capability.
What you are building
This guide turns the routing problem into an implementation checklist. The goal is not to chase every new model announcement. The goal is to make sure the application can make a clear decision before the provider call starts, and can explain the result after the call finishes.
Step 1: Define the route contract
Write down the request type, allowed models, maximum expected cost, latency target, and fallback behavior. A route contract should be short enough for a product owner to review, but specific enough for engineering to enforce. If the route can call tools or use long context, make that visible in the contract instead of hiding it in application code.
Step 2: Add controls before dispatch
Before dispatch, check API key status, model allowlist, balance, estimated cost, request class, and current route health. This is where many AI products fail: they trust the client request and discover the billing problem only after the provider has already answered.
Step 3: Settle and review
After completion, store model ID, provider, final status, latency, tokens when available, estimated cost, settled cost, and the route decision. Review the records weekly during rollout and monthly after the route stabilizes. Use the model catalog to compare available routes and pricing; use the docs to start integration work; use the routing guide to see the request path end to end.
NeuronGate angle
NeuronGate gives the escalation path a clear API, logs, and customer-visible cost once a request leaves the device. That keeps the tutorial pattern repeatable: product teams can add new AI features without reimplementing auth, balance checks, model policy, and usage history every time.
Acceptance criteria
A tutorial is only useful when a team can tell whether implementation is complete. For this topic, the acceptance test is direct: a request should be accepted, rejected, routed, or queued for a reason the operator can see later. The customer should not need to guess why a model was used or why a balance changed.
Before shipping, run the same request through a normal account, a low-balance account, a blocked-model account, and a high-latency provider state. Each path should produce a clear outcome. The result should appear in usage history with the same route name that appears in the model catalog.
Operational checklist
- Create one test key for the tutorial workflow and keep it separate from customer keys.
- Confirm the model allowlist rejects unapproved routes before provider dispatch.
- Reserve balance before the request starts and release unused reserve after settlement.
- Store enough route metadata to debug support tickets without exposing prompt content.
- Link the public docs page, the model catalog page, and the related article from this post.
FAQ
Should this tutorial be implemented in the app or the gateway?
The application should own product-specific decisions, but the gateway should own model policy, balance checks, route health, and usage settlement. Keeping that split avoids duplicate billing logic across services.
What should be measured first?
Start with accepted requests, rejected requests, fallback count, settled cost, and p95 latency. Those five numbers catch most early rollout problems before they become customer complaints.
Implementation detail for October 2025
A useful manage local model context windows starts with a small written contract. Name the workload, the current model, the candidate route, the maximum acceptable cost, the expected latency band, the owner, and the rollback route. That contract should live beside the implementation, because it is the thing future operators need when a provider changes behavior. For this tutorial, the central concern is local-versus-cloud routing, privacy boundaries, and user trust. The failure mode to avoid is that private device work and cloud model work blur together until support cannot explain where data went.
Treat the tutorial as a production exercise, not a lab note. Run it first on representative prompts, then on one low-risk internal key, then on a narrow customer cohort. The privacy product owner should review cloud handoff rate, denied data classes, local fallback usage, user consent events, and cloud cost per feature before the route is widened. The common mistake is routing sensitive prompts to cloud models without a visible policy boundary.
Copy this into your rollout note
- Decision: Manage Local Model Context Windows.
- Time context: October 2025, based on Apple context window technote and Apple Foundation Models framework.
- Owner: privacy product owner.
- Guardrail: no global default change until cost, latency, and rollback are measured.
- Evidence: keep usage records tied to customer key, model ID, provider route, and final status.
The final review should include one success path, one rejection path, one degraded provider path, and one rollback path. That keeps the tutorial grounded in production behavior instead of screenshots. A practical next step is to compare routes in the model catalog, wire one request through the docs, then review the request path in the routing guide.